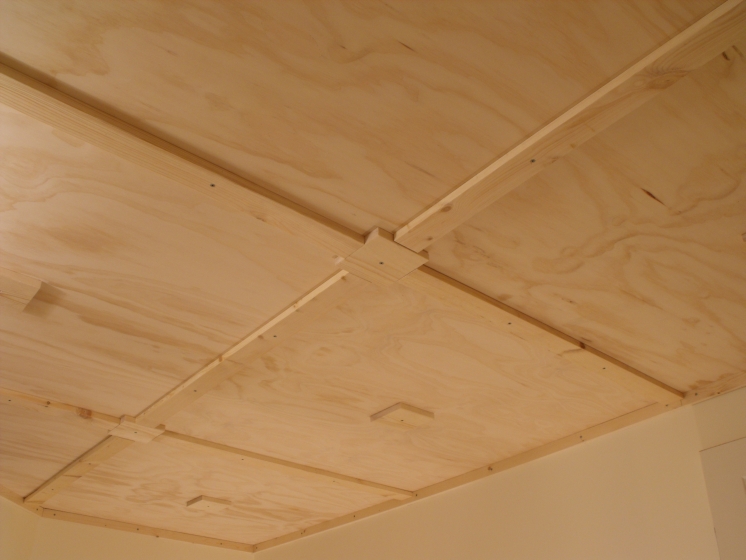
Don Oystryk Removable Panel & Batten Basement Ceiling Jays Custom
To cover the gaps between boards and seal out the weather, battens (1×2 or similar) were nailed on top of the gap where the boards meet. While the look of board-and-batten siding came.
How to Install Board and Batten As an Accent Wall Grace In My Space
1- Skim Coat. Skim coating is applying a thin layer of joint compound over the wall. Joint compound is the stuff used to cover up the screw holes and seams of your drywall to make your wall look like one piece. Here is a very good skim coat tutorial by my friend Jen, @Makingprettyspaces.

Board And Batten Ceiling A Comprehensive Guide Ceiling Ideas
A 1920's bungalow home in the heart of downtown Carmel, California undergoes a small renovation that leads to a complete home makeover. New driftwood oak floors, board and batten walls, Ann Sacks tile, modern finishes, and an overall neutral palette creates a true bungalow style home. Photography by Wonderkamera.

A coffered and batten board ceiling. Grey Ceiling, Timber Ceiling
Board and batten is a type of wall treatment that involves placing boards vertically on the wall with narrow strips, known as battens, in between. This creates a beautiful texture and adds interest to the walls. Originally used as an exterior What is Board and Batten

Dining room board and batten and coffered ceilings. Coffered ceiling
Wood siding that consists of narrow vertical strips or battens installed over a flat base or board is known, logically enough, as board and batten, or batten board. It has been popular.

a bedroom with a large bed and two lamps on either side of the headboard
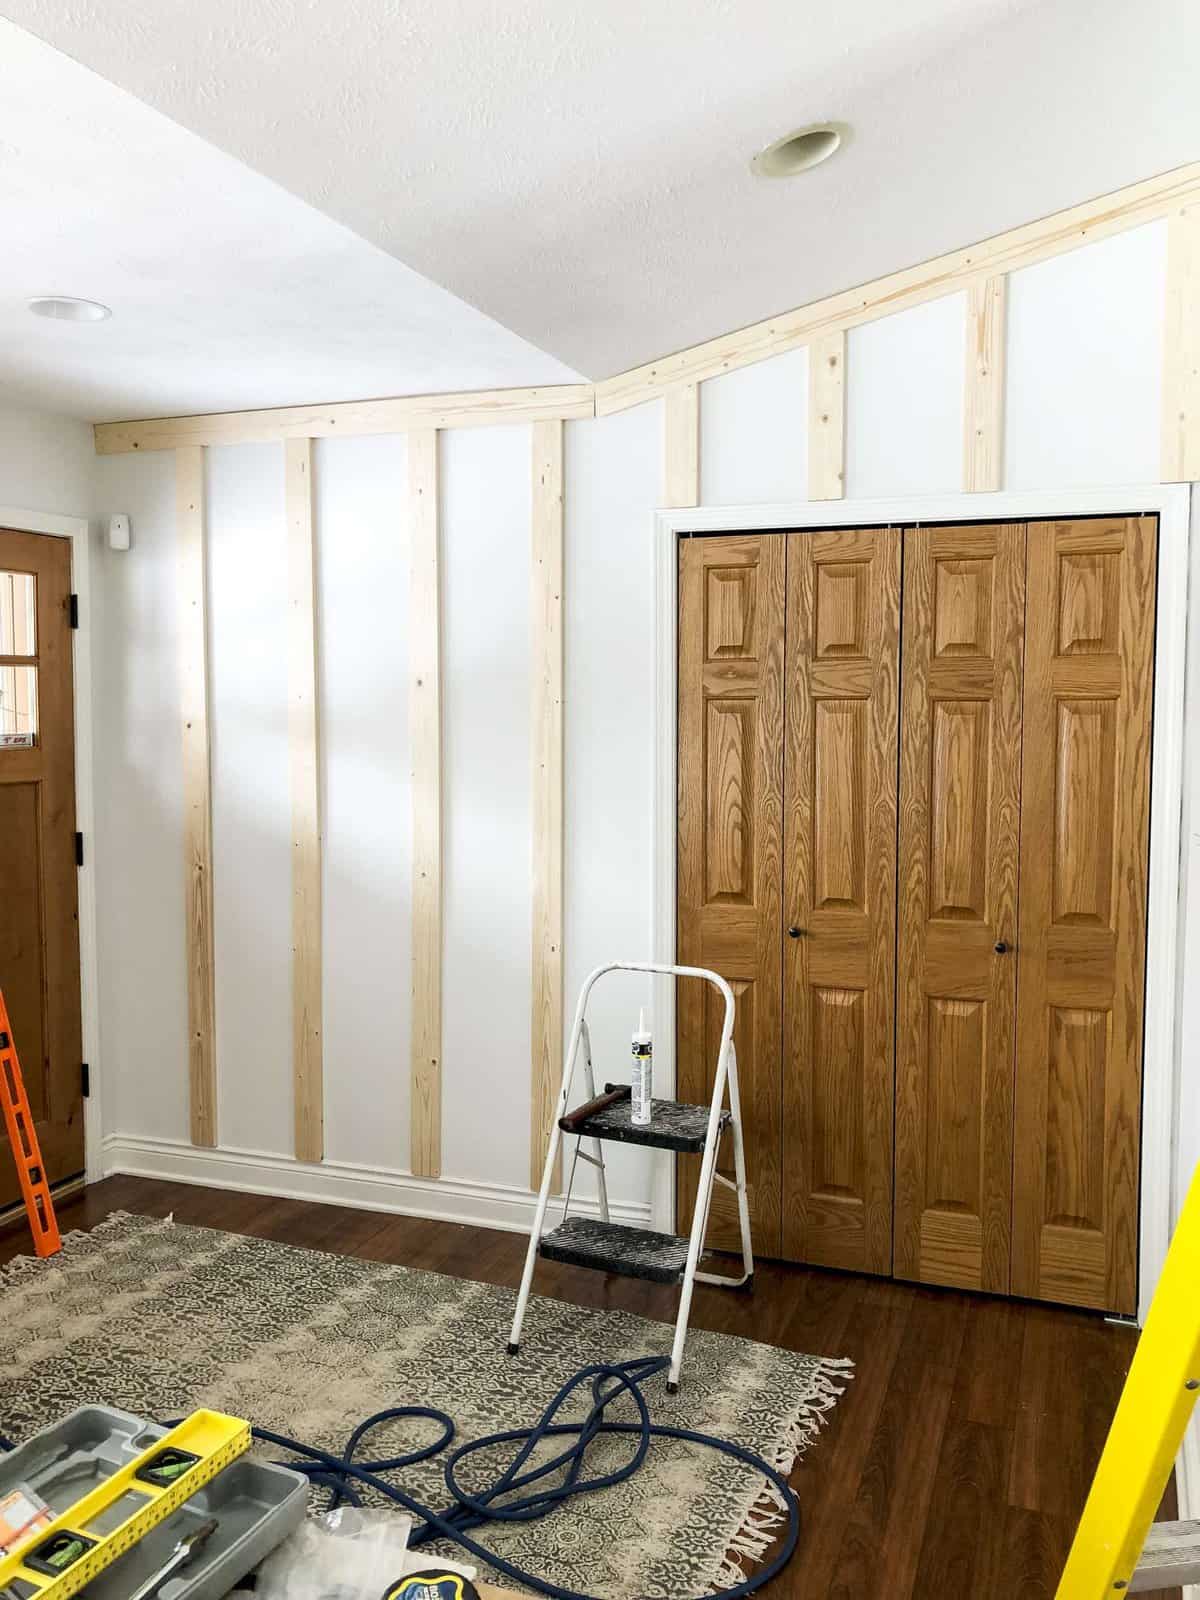
Board and batten walls are one of the easiest ways to make a space feel custom. Thankfully, it doesn't take too much skill to be able to install board and batten. I've done it in many rooms in my home, completely by myself! I find that DIY board and batten is the way to go since the cuts are quite simple and the installation is straightforward.

flat stock with molding for short coffer look Coffered ceiling
Step Five : Fill Holes & Gaps. Next up is filling all the holes and gaps. To fill those small nail holes you can use wood filler leaving a bit extra over the nail holes. One tip with wood filler is to not try and scrap the spackle flush with the surface. It will shrink a little and leave a small divot.

Remodelaholic How to DIY Floor to Ceiling Board and Batten
Follow this board and batten spacing tutorial and you will end up with the professional-looking results you want! 1. Mark out the spacing. 2. Measure the height you will need for that batten in that place. Cut your batten. (Do this for each batten, as ceilings and floors are not as level as you think!) 3. Place the bottom of the batten at your.

Floor to Ceiling Board and Batten Tutorial HoneyBear Lane
It's best to space them evenly, about 10-12 inches apart, but they don't have to be exact. For example, if your wall is 100 inches wide, you'll install a 2-inch board on either side, then have 96 inches left to fill. Divide 96 by 12 (the number of inches between each batten, center to center) to get 8. Subtract 1 to get the number of battens.

Floor to Ceiling Board and Batten Tutorial HoneyBear Lane
Total Time: 1 - 2 days Yield: Board and batten feature wall Skill Level: Intermediate Estimated Cost: $100 to $200 A DIY board and batten wall can add depth and visual interest to your interior that's unachievable with ordinary painted drywall.
Floor to Ceiling Board and Batten Tutorial Honeybear Lane
1. Measure the area of your ceiling, and purchase the materials you will need. You will want to use MDF 1x boards and trim, as well as nails, glue, and caulk. 2. Begin by installing the boards on the ceiling. Nail them to the joists using 1-3/4 inch finish nails. 3. Next, cut trim pieces to your measurements.

Ceiling Beadboard Facade Wichita, KS Pinnacle Homes, Inc.
Cost Board and batten, or board-and-batten siding, describes a type of exterior siding or interior paneling that has alternating wide boards and narrow wooden strips, called "battens." The boards are usually (but not always) one foot wide. The boards may be placed horizontally or vertically.

Board And Batten Ceiling Renovation progress report week 43
Learn how to install a board and batten wall from floor to ceiling and with crown molding!! This DIY board and batten accent wall adds character to any room.

Board And Batten Ceiling Renovation progress report week 43
Set your saw to a 45-degree angle. Place your board upside down on the saw. Cut the left side of the board with the saw angle to the right, and cut the right side of the board with the saw angle to the left. The crown molding should look like an isosceles shape. The Spruce has a good tutorial for this.

Image result for board and batten ceiling Renovations, Basement
Step 2 - Determine the height of the horizontal board / top board. Decide if you want the board and batten from floor to ceiling or just a portion of the way up the wall. There are NO hard and fast rules of how tall the board and batten wall has to be! A board and batten project can be as unique as your mind can create.

Our Barn House Kitchen & Dining Room Renovation! Part 2
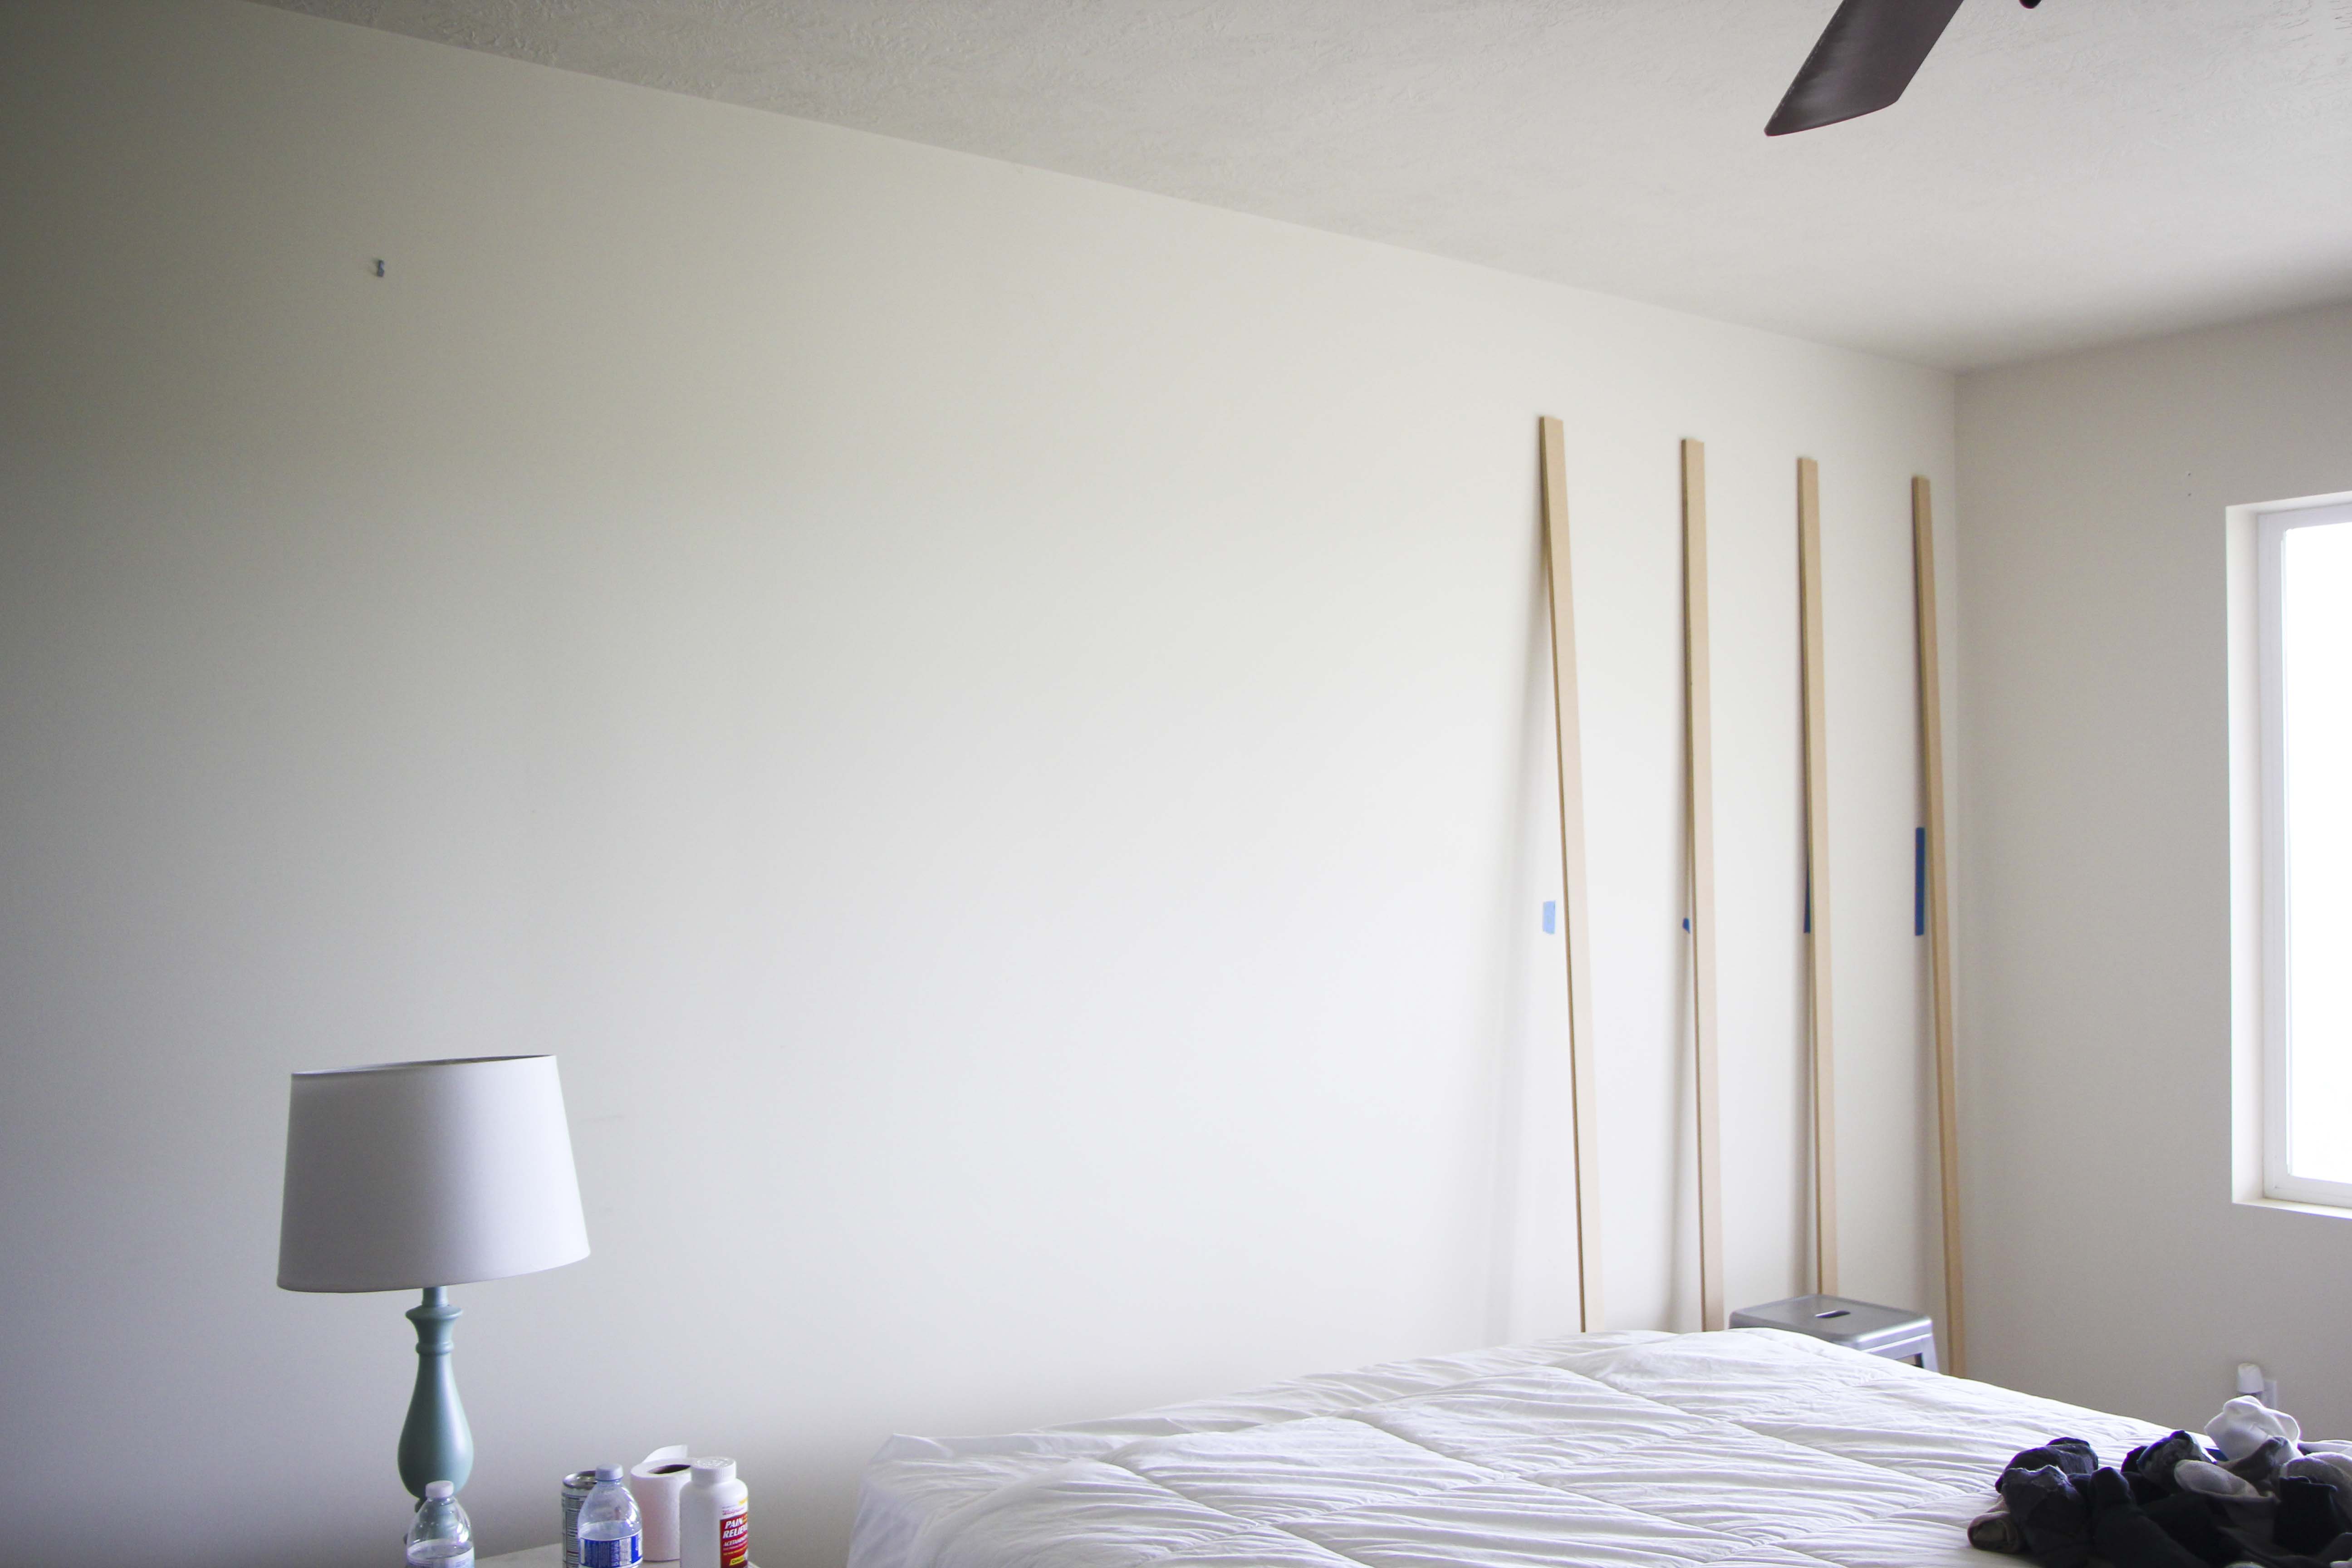
DIY Floor to Ceiling Board & Batten {Master Bedroom Progress!} June 5, 2014. Yay! I am happy to report some amazing progress on our little Master Bedroom update. The other day the hubs and FIL (Father-in-Law) installed some floor to ceiling board & batten on the wall behind our headboard and it, along with a quick headboard reupholstery job.
